
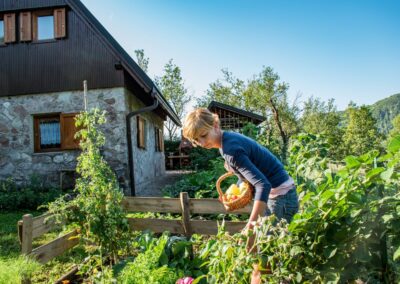
If built properly, you’ll find that raised garden beds are foolproof, are less work and strain on the body, easier to combat weeds, better at draining in the summer and maintaining warmth in the winter, more space-efficient — and they look fantastic.
Raised garden beds look professional, but they’re actually quite easy to construct – you don’t need to be a carpenter to build a DIY garden bed.
Step 1: Decide on the Raised Bed Location
Even if you’ve never held a hammer in your life, you can build an above-ground vegetable garden. But before we get ahead of ourselves, decide where you want to assemble your raised bed.
Nowadays, front yards are just as good as backyards for raised beds— some folk even carve out a plot of about four feet wide and eight feet long right there in the green grass within their manicured front yard. Basically, there are no holds barred these days as to where to locate a raised bed — they all look impressive.
Step 2: Design your Raised Garden Beds: Size and Height
There are so many design options — from one single traditional three-feet wide and six-feet long raised bed to several smaller raised beds, in the form of a plus sign, for example. Get creative and try to envision what might work for your space, needs and preferences.
Mind you, size is not the only thing that matters when it comes to raised bed gardening: you need to consider height as well.
- Your raised bed can be a simple wooden frame, meant to hold the garden soil together. This is what most people build and consider a raised garden bed.
- If the soil in your garden is an issue (e.g. you’re trying to grow a garden on a piece of rock or like us, in very tightly packed clay with poor drainage), your raised garden bed will need to be higher – to allow the roots more space. It’s hard to grow big and beautiful tomato plants when the roots hit rock bottom (literally) just 15 centimeters (or half a foot) down.
- If mobility is an important reason for you to build raised garden beds, you will need to build one at table height so you don’t need to bend down (much). If you’re growing herbs, flowers and smaller plants, you can build it on or like an actual table, so you can store stuff (composting bin, pots, wheelbarrow, etc.) underneath.
Step 3: Design and Materials
Building a “frame” type garden bed
The next step is to find your material. You’ll need a border to support the height of the raised bed. anywhere from about six inches to 18 inches. Typically, wooden planks serve this purpose well. Measure your planks and then mark off the land, dig shallow trenches, stand up the planks and partly bury the wood.
Another idea is to buy 12 pieces of inexpensive rebar and hammer two of them (just a couple of inches into the ground) on each side of your rectangle — obviously on the outside of your planks to support them against the weight of the soon-to-arrive soil.
The wooden planks won’t last forever, however, but maybe they’ll make it past five years, at which point it’s easy to replace them without any harm to your garden. Other easy no-dig border options are to lay down cement blocks, logs or — a bit more work, but just as effective — branches tied up in long bunches. You can find other ideas here.
We started our raised bed adventures with low (wooden frame) beds, but have since found that they’re not ideal – because the soil below is still rock hard, because the chickens love to sunbathe in them, dogs love to bury and dig stuff up, and don’t get me started on the cat. We’ve since repurposed most of the wooden planks, but the soil is still there – and most of the herbs (and the Calendula flowers!) are still going strong on those patches.
Building a high garden bed
If your garden bed is high and deep, you need to consider materials more closely. You can still build it with wooden planks but keep in mind these will start to rot after a couple of years at the most… at which point you’ll either need to reinforce them with new planks, or your raised bed will crumble.
We built our high-raised beds with cement blocks to withstand the test of time, but they’re a bit of an eyesore… Our plan is to make them look prettier at a certain point by sticking either wooden planks or stones to the sides.
Layering and Soil for Raised Bed Gardening
When your frame is built, along the bottom of the frame, layer some newspaper, cardboard or weed-barrier landscaping fabric to help prevent the invasion of any weeds or pests. If you’re using newspaper or cardboard, grab your hose and water it to provide some bottom moisture for the soil and seeds.
If you have a problem with gophers or other rodents, try laying down some tightly woven chicken wire first and then cover that with newspaper, cardboard or fabric.
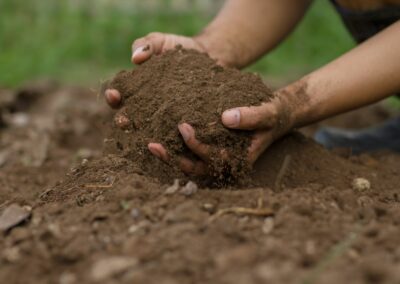
Next, fill your raised bed with soil to about a couple of inches from the top edge. The soil you choose matters, so don’t skimp too much here. There are a ton of options, so do a bit of research and see what you like best.
I usually use bags of regular planting soil mixed with a bit of horse manure, and my plants and veggies have done great. Other people swear by 60% topsoil, 30% compost and 10% potting soil (composed of peat moss, perlite and vermiculite).
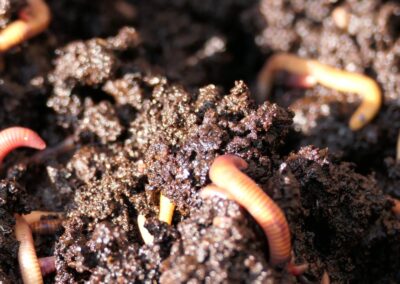
In the growing season, it’s advisable to throw on additional composted material (from your kitchen compost or fermented horse manure, for instance). This will keep your soil healthy, as well as encourage plant and organic material growth.
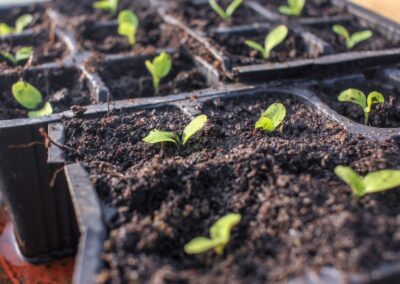
Seeding and Mulching Raised Garden Beds
Finally, you’re ready to plant. If, however, you decide not to plant immediately, cover your raised bed with leaves, grass clippings or other organic material to create a self-made mulch for when you are ready to plant.
(Tip: Don’t mulch it with grass you pulled or dug out from other places, as the grass will easily take root… and no one wants a raised bed just to grow grass!)
If it’s hot outside when you decide to plant, water your raised bed before sticking in the seeds. This step will coax growth while not disturbing the seeds as they settle into their new home.
If you’re starting with just one raised garden bed and want to maximize the yield, try square-foot gardening. It’s a fantastic fun way to increase and maximize your space and harvest.
Let me know how things go in the comments below!


0 Comments