
Vermicomposting is the art to make compost by feeding your scraps to a bunch of wriggly worms. Not just any worms, and not just any scraps – as I said it’s an art 😉
Or, to phrase it a bit more seriously – vermicomposting is a highly effective method for converting organic waste into nutrient-rich compost, using worms to break down organic material.
While “vermiculture” is the practice of raising worms, “vermicomposting” means keeping worms specifically for the purpose of using the worm castings (vermicast) as compost.
Vermicomposting: How Does it Work?
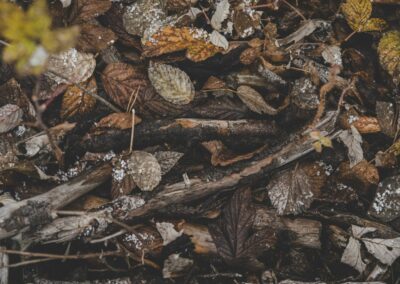
Vermicompost is the excretion of the earthworm; it’s rich in humus and therefore makes for excellent fertilizer for any garden.
You get started by putting worms in a specially designed “worm bin” filled with moist bedding material, and then start adding food scraps regularly.
The worms consume these organic materials, breaking them down into smaller particles through their digestive systems. As they move around the bin, they leave behind worm castings, which are rich in nutrients that are great for the garden:
- Nitrogen (N): for healthy leaf growth;
- Phosphorus (P): supports root development;
- Potassium (K): enhances fruiting and flowering;
- Calcium (Ca)
- Magnesium (Mg)
- Micronutrients: contribute to overall plant health.
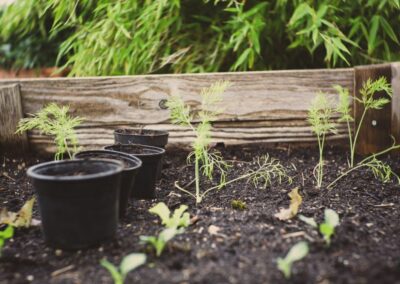
Once you’ve got things started, vermicomposting is not necessarily more complicated than keeping a regular composting system – and as a bonus, it can be done in a very small space and even with very little organic matter.
My own Vermicomposting Story
Vermiculture in hot & dry Spain…
I started my vermiculture adventure after seeing a friend’s worm bin. He gifted me a little box of his worms, I got myself a second hand vermicomposting setup, and we were off to the races. I kept the worm bin next to the regular bin in the kitchen for a while then, as it got too hot in summer (this is Spain, after all), I moved them downstairs where I could guarantee a more even temperature – and they thrived for years.
I loved that my Spanish worms were almost maintenance-free – I would feed them small amounts of organic waste from time to time, add some water (or juicy waste) occasionally, ignore them for weeks at a time, and in return I got beautiful black compost year after year.
However, one day, someone must have moved the bin out of the way and into direct sunlight – by the time I got back and noticed, the system was all dried out.
And a similar worm bin in wet & cold Belgium
A year after, I started a similar setup in Belgium and the situation couldn’t have been more different: the first summer, my main concern was not to keep my worms cool and hydrated (like I’d do in Spain), but I found myself tapping off “worm water” as bonus fertilizer for my plants.
The garage, while being one of the warmest rooms in the house in summer, worked pretty well for my newly established worm colony. And from September onwards, my main concern has been to keep them at an even temperature (and not too cold so they can keep doing their good work).
Benefits of Keeping a Worm Bin
While I’m slightly biased and can’t find many downsides to vermicomposting, the benefits are clear as day:
- Eco-friendly waste management – no need to fill a bin bag with your kitchen scraps
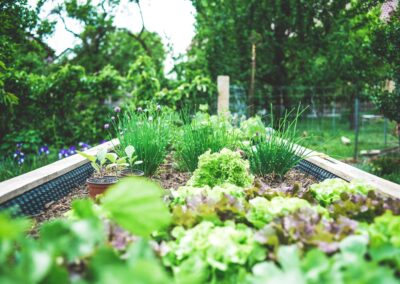
- High-quality fertilizer – no need to buy bags of compost every year. Vermicompost enhances soil structure, improves water retention capacity and promotes beneficial microorganisms’ growth for healthier plants.
- Low-cost: you can make your own worm bin and get your first worms from a friend, setting setup costs to zero
- Low maintenance: I’d call it “no maintenance”, except from time to time you’ll need to throw some scraps in – and when the compost is ready, you’ll want to get it out.
- Great for small spaces: in my experience, a healthy worm bin doesn’t smell or create a mess. I’ve had a worm bin in my kitchen and the only mess it made was someone-who-shall-not-be-named throwing his coffee grounds in carelessly (and mostly next to the bin). I’ve seen people have one on their apartment’s balcony, well protected from the elements.
- It’s just fun. I find those little wriggly things producing that beautiful black soil for me utterly fascinating.
Reasons to Not Start Vermicomposting at Home
If there’s just one reason to not keep worms: it takes patience. An acquaintance got a worm bin partly as an educational opportunity for her children and in the first few weeks (when you’re supposed to leave them alone so they can establish themselves) the worm bin got opened and disturbed multiple times a day… at least, that’s what we blamed the failure on.
Also keep in mind that with a small worm bin, you can’t expect bags of compost every month.
Thirdly, when faced with extreme conditions (too hot, too dry, too wet, too oily, too moldy) your bin could start to smell or worms can start finding their way out. This can usually be corrected quickly by adjusting their food – or moving the bin to a more appropriate location (scroll down to “troubleshooting” for more on this).
Choosing the Right Worms for Your Compost Bin
Not all worms are suitable for this process. If you grab some random worms from outside, you may not be successful…
Red wigglers (also known as red worms or Eisenia Fetida) have several traits that make them perfect candidates:
- Rapid reproduction rate: a healthy population of red wigglers can double in size every two months. That is, if you give them the space and the food to do so.
- A love for decomposing matter: red wigglers prefer eating decaying plant material over fresh produce, making them excellent at breaking down kitchen scraps.
- Tolerance for varied conditions: while they do best in temperatures between 13°C (55°F) and 25°C (77°F), they can survive in a wider range if necessary.
I have been hosting Red Wiggler worms in my own worm bins, and so do all other people whose vermicomposting setup I got to admire over the years. I have no direct experience with other types, but my research shows there are other suitable earthworm species for vermicomposting like
- European Nightcrawlers (Eisenia Hortensis), also often used in fishing bait, and who can handle a wider temperature than red wigglers)
- African Nightcrawlers (Eudrilus Eugeniae), who thrive in warmer temperatures).
- Blue Worms (Perionyx Excavatus), who prefer acidic conditions but migrate when their environment gets too wet or too dry.
Setting Up Your Vermicomposting System
To start vermicomposting, you’ll need a well-ventilated worm bin. You then place that bin place it in a location with minimal temperature fluctuations for best results.
A lot of people will start with a DIY worm bin from almost any material, but kits are available as well.
For my own first worm bin, my first instinct was to make it a project and build it ourselves, modeling it after some of the intricate DIY worm bins I had seen with friends over the years: made from wood, or in an old bathtub, or attached to the greenhouse,… Until someone pointed out that none of those had ever contained living worms. Most came with stories of “we had worms but then it got too [insert temperature/weather condition here] and they all disappeared”.
So my reasoning became that if I started with a small pre-made worm box, I’d be able to move it around if I needed to, protecting it from extreme conditions.
For the second bin… I compared all the models again, compared DIY systems, all the different types of worm bins, and ended up buying a very similar model in Belgium as I had in Spain. Both are a version of the classic Worm Factory – and if you’re in Belgium or the Netherlands, I recommend looking around on the BalkonTon website.
Best Location for your Worm Bin
While we’ve already established that protecting worms from anything extreme is paramount, these three factors are decisive for the success of any vermicomposting installation:
- Avoid direct sunlight. This causes overheating and simply kills your worms.
- Maintain a consistent temperature. Even without direct sunlight, your worms will be most productive if you maintain a temperature between 13 and 25 Celsius (55 and 77 Fahrenheit). Most people keep their worm bins in a basement or garage.
- Ensure proper ventilation. This prevents unpleasant smells and helps with the composting process.
What to Feed (and Not Feed) your Worms
Ideally, you’ll want a ratio of 70% green matter (kitchen scraps) to 30% brown waste (cardboard, leaves, etc).
Best food for your worms are
- Fruit scraps (apple cores, banana peels, carrot tops, lettuce leaves,…)
- Most vegetable scraps (see also what to NOT feed them)
- Coffee grounds. Worms LOVE coffee grounds and tea bags.
- Eggshells, in moderation. They like them and will process them, but do this slowly.
- Manure from small herbivores (rabbits and guinea pigs) can also be a great addition
Worst things to feed your worms:
- Meat and dairy don’t get processed well + attracts insects
- Too many fatty & oily substances can reduce oxygen levels in the bin
- Spicy food, chili peppers, onion, garlic – great to chase your worms away
- Too much citrus – orange, lemon, etc peels are ok in small quantities, but won’t get digested very well or fast
Avoid giving any food in big quantities – or big quantities in general, as long as your worm bin is not well-established. E.g. too much bread or pasta will start to mold pretty fast.
Worm Bin Troubleshooting
When your worms aren’t looking great, these can be some of the causes (and solutions):
- Moisture level is too low – add water in small amounts, and/or some juicy food scraps.
- Moisture level is too high – drain excess moisture. Prefab worm bins often have a little tap at the bottom for this purpose. I’ve never needed that tab in inland Spain (but can imagine you’d need it if you live near the Spanish Costa where it’s more humid). Adding cardboard or dry leaves can also help to absorb and regulate some of the humidity.
- Too much food to process – you may need to remove some of the moldy bits.
Harvesting your Worm Casting Compost
Usually, you’ll have the first worm compost ready to go about 3-4 months after start.
Depending on the type of worm bin, you’ll have added new organic matter consistently e.g. at the top or to one side.
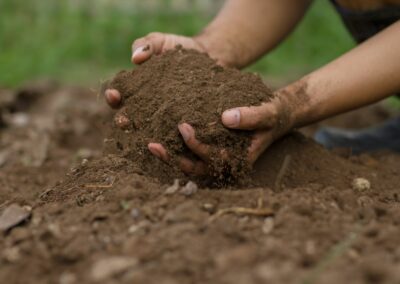
You know it’s time to harvest when you can’t recognise the original foods anymore in the bottom tray (or the side you started it), and it has all been turned into dark brown or black crumbly material.
If you have a worm bin with trays (like mine), harvesting is easy and quick – the worms will have crawled their way to the higher-up trays (where there’s still food), so you can simply grab the bottom tray, empty it, and place it back as the top tray.
If your worms, compost, and fresh foods are all in one place, you can either
- Move everything to one side of the bin – and then pick out undigested food (+ add new food) to the other side. In a matter of weeks, the worms will also migrate to that side – and you can get your compost from the other side.
- If you don’t have that kind of time or patience, you can simply spread out everything on a tarp and manually sort through it. Here’s a good guide on how to do separate worms manually.
The nutritional value (for your plants) of your finished compost will depend on what you feed to your worms. It can be interesting to test your worm casting harvest (pH level, concentration of salts) just so you’re aware of its properties and how it can influence your garden.
Common Mistakes in Vermicomposting
= How to kill your worms effectively… or chase them out of the bin (which usually also kills them, if they have nowhere to go).
- Overfeeding worms (too much food in one go)
- Inadequate ventilation
- Too dry
- Too wet
- Feeding (too many) non-compostable items (meat, dairy, onions,…)
If you’ve got a worm bin or you’re about to start one, please share it in the comments – what type of worm bin did you go for? How’s it working for you?

0 Comments