
Hugelkultur is a German word which means “hill culture”. It’s a technique often used in permaculture to build and manage soil. It relies on stacking wood at different levels to create a raised garden bed. The wood decays over time, leaving behind composted layers of humus and nutrients for your plants to grow in.
Now to clarify: the hill or mound referred to in the world Hugelkultur doesn’t mean it’s something to be build ON a hill; hugelkultur often doesn’t end well on hillsides (this post by Jack Spirko has a few pretty impressive examples of why not… and we’ve seen a couple with our own eyes as well).
No, the hugelkultur IS the hill (or small mound) – it refers to the pile of wood and other materials you’d stack and slowly let deteriorate into amazing soil. In many cases, it will either just flatten and seep into the ground and/or expand to the sides. Ours did a bit of both.
Why use Hugelkultur?
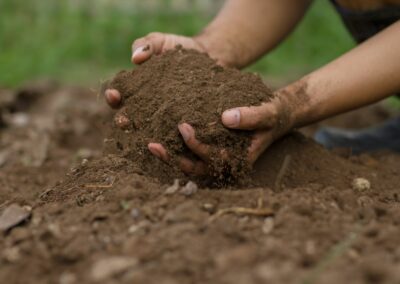
Hugelkultur is a great way to manage your soil without too much work. It’s also an excellent way to create healthy garden beds that are full of nutrients and minerals that your plants can use!
There are basically 3 potential reasons to build a Hugelkultur bed:
- A Hugelkultur bed has the capacity to retain more water and nutrients than most (regular) garden beds.
- It’s also a great idea for gardeners who do not have a lot of space available; Hugelkultur allows them to store more water and create more fertile land than they would normally be able to achieve with regular garden beds.
- Most people who build Hugelkultur beds do it as an alternative to composting: you start with a pile of wood, but you can basically add anything else to the mound.
We’ve seen people build a Hugelkultur bed on barren, rocky soil – and start growing food on them within months. Not everyone grows food on a Hugelkultur bed right away; it’s often used only as a way to build soil and restore natural balance to a bit of land that got depleted or that burned down.
Some permaculture enthusiasts and practitioners believe that this method and others like it are suitable for every situation, but it is true only in very specific cases.
Hugelkultur is basically a great way to build soil if you have abundant supplies of wood.
For instance in our area, locals would often burn wood left over from pruning their olive and almond trees. During the pruning season on days without wind, the air can be gray with smoke.
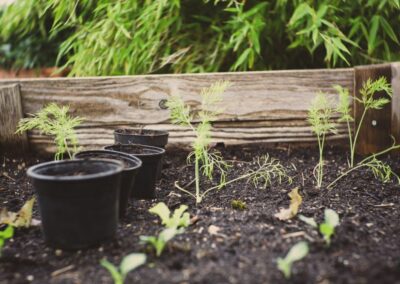
However if you just pile and cover that same wood, it turns into great and nourishing soil. We built two Hugelkultur mounds in the course of the years here at Mas del Encanto, and each of them gave us abundant harvests – and are now the home to a couple of perennial herbs and bushes.
Where does Hugelkultur come from?
This permaculture method has been around for hundreds of years and it was initially used by European peasants who needed to grow food during periods of low rainfall.
Most people could not afford to buy fertilizer or any other artificial means necessary to grow food. They tried to make their land as fertile as possible by growing cover crops, rotating them with cash crops and by allowing their livestock to graze their land.
There were no tractors, so they needed a method that would allow them to grow enough food in the smallest amount of space possible. Hugelkultur was an ideal choice, but it took some trial and error for people to figure out how using it would work.
Hugelkultur was made famous by Sepp Holzer; the technique gets explained thoroughly in Sepp Holzer’s Permaculture (which incidentally is one of the best books on permaculture and/or growing food I know).
Warning: Not All Wood is Suitable for Hugelkultur
When you’re building your Hugelkultur mound, make sure that the side facing the sun is composed of wood that has not been treated with any chemicals! This will help to create healthier compost and soil.
If the wood you’re planning to use is colored and you don’t know what it has been used for in the past, it is often best to avoid using Hugelkultur because the wood may have been treated with chemicals or paint.
Apart from treated wood, some types of wood will not give you great fertile soil. Read this thread on the Permies forum for some discussion around that topic.
How to Build a Hugelkultur Mound
Hugelkultur always starts with wood: collect as much wood as you can, whether it’s from your own property or even from abandoned farmland, other people’s prunings, etc.
To make sure it stays in place, dig a shallow ditch to place the wood in. Instead of digging, you can also opt to create a contour with stones (basically, a low wall) – anything to keep the wood and organic matter in place, at least at first.
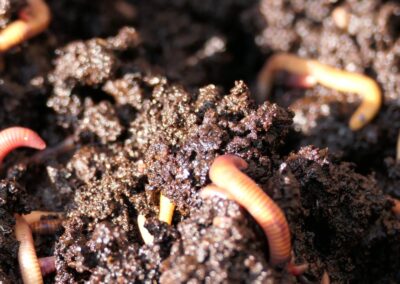
Add in other organic material: leaves, hay, soil, some will even put in small dead animals – basically anything goes, as long as you can trust it will decompose over the course of the years and not contaminate the soil with chemicals or inhibit seed germination.
Also, when adding other organic matter than wood, make sure to alternate layers so a single type of material doesn’t create a thick cover.
However when you’re done, you’d cover the whole thing with a layer of soil.
Once you’ve built your Hugelkultur mound…
While some people will take weeks or even mounds to build their Hugelkultur mound by adding small amounts of wood and/or composting materials regularly, others will build a full Hugelkultur hill in a day. It’s up to you!
It’s a good idea to keep track of your Hugelkultur – note what you added where so you can observe how it decomposes, which parts make it easier to grow things on them – and which parts turn into better soil long-term.
Not only that: keep track of how you managed your mound during the year to make sure that it is still in good shape. If there are any weak spots, they will need to be patched up or they may collapse. As illustrated in the article I also linked above, big Hugelkultur beds built without management can lead to serious accidents!
Caring for your Hugelkultur mound is a task that should only take a few minutes every month or so. You can add more wood at least once a year, and you also drain excess water from your Hugelkultur if it starts to get too soggy!
Do your own research before starting with Hugelkultur
Please be advised that there are many different opinions regarding this technique – so you should do some research on your own before deciding whether or not it works for you. This article has hopefully helped you understand the basics of the method, but it is recommended that you speak to an expert and do your own research before implementing any of the suggestions in this article.
Seeking expert advice may also help you understand whether or not it could go wrong in your situation. You should ask yourself if your mounds will be okay with heavy rains, strong winds, and snowstorms.
That being said, you can always start with a smaller mound in a safe space where it can’t create any damage nearby… and expand from there.
Here’s to building amazing soil and growing an abundance of food!


hi Sandrine, hebben jullie naaldhout gebruikt of alleen eik of olijf, amandel etc. wij zijn ook bezig met de hugels maar het meeste hout is dennehout.